How do I manually set up the WordPress cronjob?
By default, WordPress performs a number of tasks, called cron jobs, on each page that is loaded. These tasks keep WordPress clean and up to date, but requires a lot of resources with many visitors and can delay your website. Because it is important to perform these tasks, we explain in this article how to manually configure the WordPress cron job.
Steps
Step 1. Log in to cPanel.
Step 2. Under File, click File Manager.
Step 3. Navigate to the folder where you have WordPress installed. Most of the time it is /public_html/ or /public_html/wordpress/.
Step 4. Click right on the file wp-config.php and click Edit.
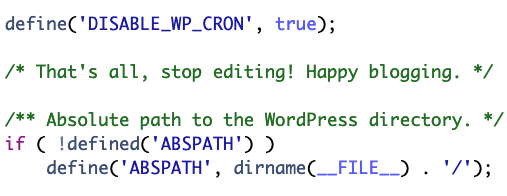
Step 5. Scroll down until you get the text That's all, stop editing! Happy blogging. If you don't see this text scroll to the bottom. Paste the following line above:
define('DISABLE_WP_CRON', true);
Step 6. Click Save Changes and then Close at the top right.
Step 7. Return to cPanel and click Cron Jobs under the Advanced category.
Step 8. Under Common Settings, select Twice a day.
Step 9. Find the folder where WordPress is installed. If the current location is /public_html/, add the following line under Command:
cd /home/your_account/public_html; php -q wp-cron.php
Change the line above to the location of the WordPress installation if it is installed in a different folder. Update your_account to your cPanel username.
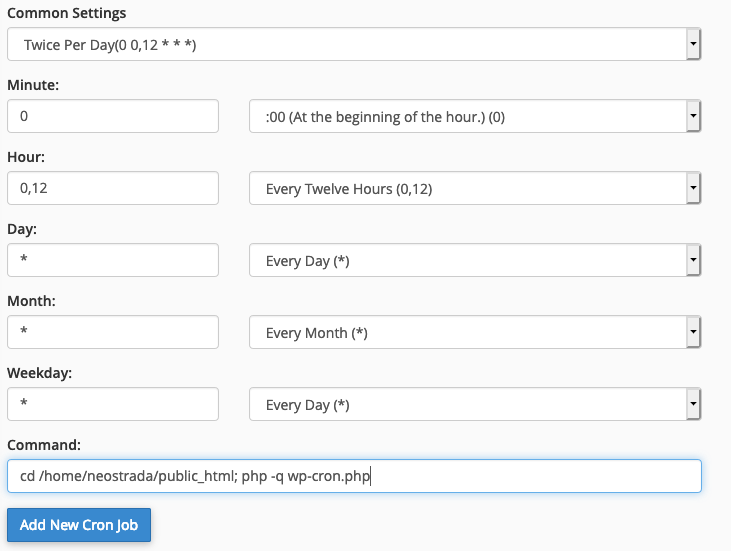
Step 10. Click Add New Cron Job to add the cron job.


