How do I set up my email address in Outlook?
You can view your email anywhere in the world through our webmail. However, it may be nice to add your email address to the email program on your laptop, desktop and / or smartphone. In this article, we explain how to set up your email address in Outlook.
Steps for Windows
Step 1. Start Outlook.
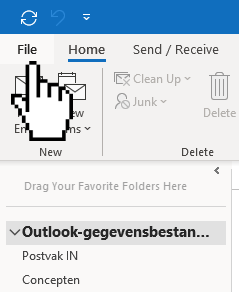
Step 2. Click File.
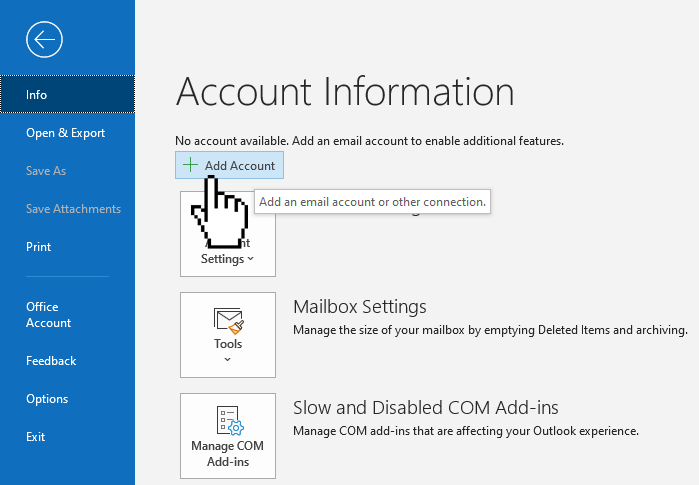
Step 3. Click Add Account.
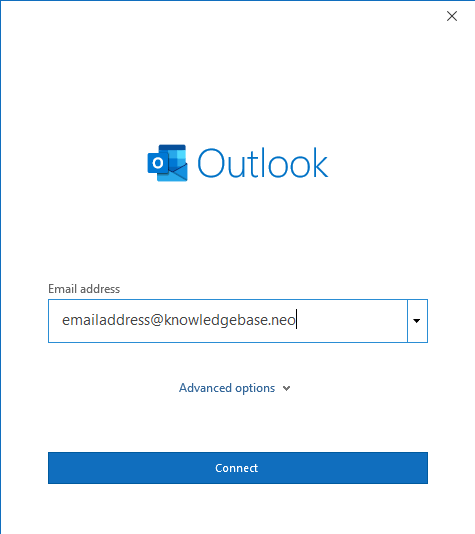
Step 4. Enter your email address. Outlook will try to load the settings automatically. Click Connect.
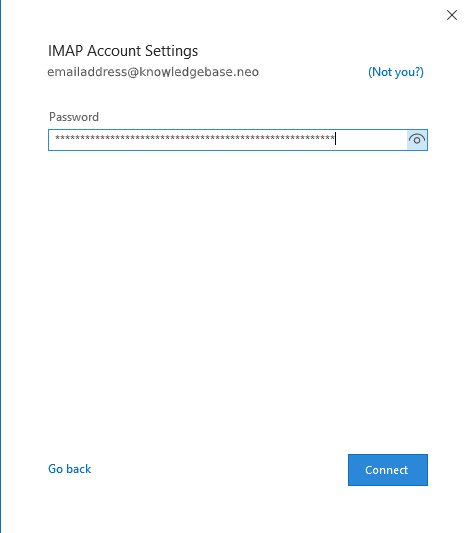
Step 5. Now enter your email password, and click Connect.
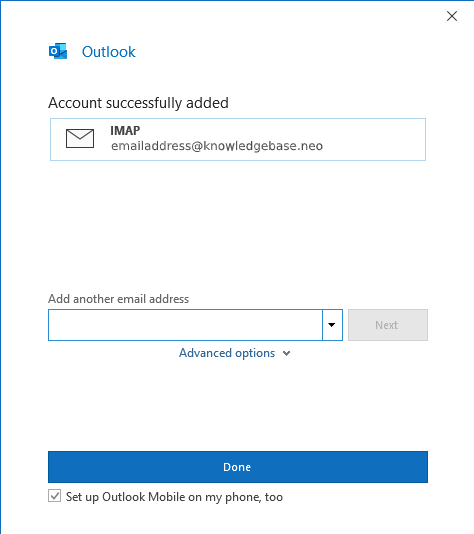
Step 6. Hurray, your account was succesfully added! Outlook will send you a test-email, and your email will be downloaded.
Error-solving for Windows
If, after adding the account to your Outlook using the steps above you are still getting errors, or if you are not seeing your email, follow these next steps. We will check the server settings for your newly added account.
Step 1. Click File.
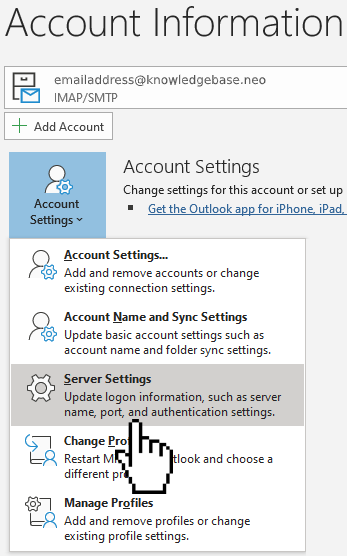
Step 2. Under Account Information, click Server Settings.
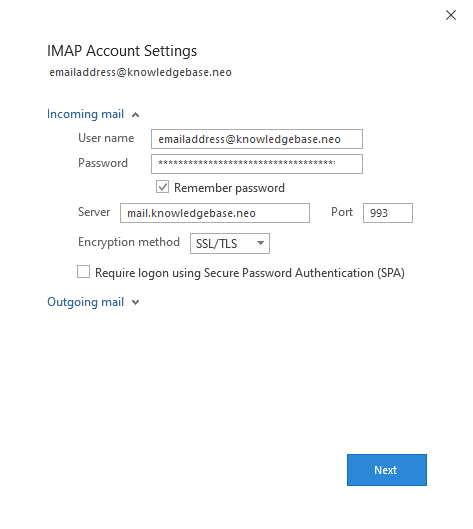
Step 3. Check the account settings for Incoming mail. The settings you should see are:
- User name: This should be your email address. In this example we use [email protected]
- Password: This should be your email pasword.
- Remember password: This setting is optional, and can be set as you wish.
- Server: This should, in most cases, be mail.domain.extension (where you replace domain with your domain, and extension by your extension such as .com or .org). If you use G-Suite or Office 365 installations, you will have to use the settings the administrator set up for you.
- Port: For IMAP connections this is 993, for POP3 connections this is 995. We recommend using IMAP with port 993.
- Encryption method: This should be SSL/TLS.
- Require login using Secure Password Autentication (SPA): This box should not be ticked, as shown in the example.
Step 4. When you click Outgoing mail in the previous screen, you will see the following screen, check these settings as you checked the incoming mail settings.
- Server: This should, in most cases, be mail.domain.extension (where you replace domain with your domain, and extension by your extension such as .com or .org). If you use G-Suite or Office 365 installations, you will have to use the settings the administrator set up for you.
- Port: This should be port 465 for sending using the SMTP server.
- Encryption method: This should be SSL/TLS.
- Server timeouts: The default option should suffice, and this setting can be changed as you wish.
- Require login using Secure Password Autentication (SPA): This box should not be ticked, as shown in the example.
- My outgoing (SMTP) server requires authentication: The box for this option should be ticked. You can use the first option, the information for the sending server is identical by default.

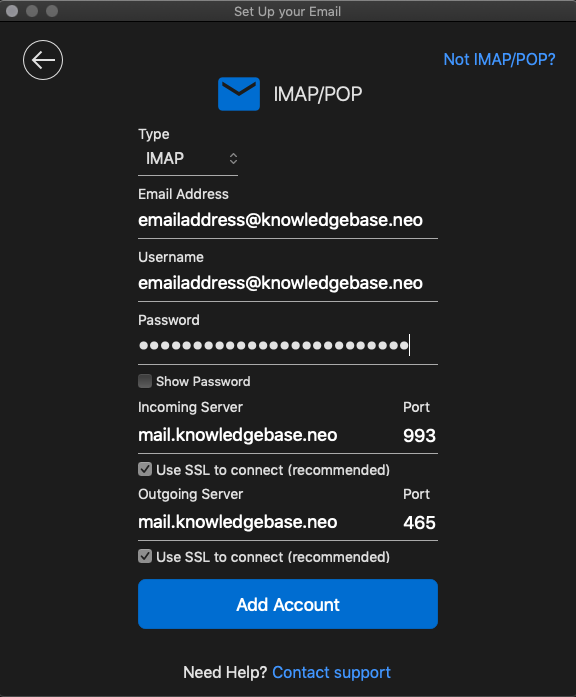
Steps MacOS
When you first open Outlook on MacOS you will see a pop-up prompting you to add a new e-mail address. If you closed this window, you can add a new account using the steps below.
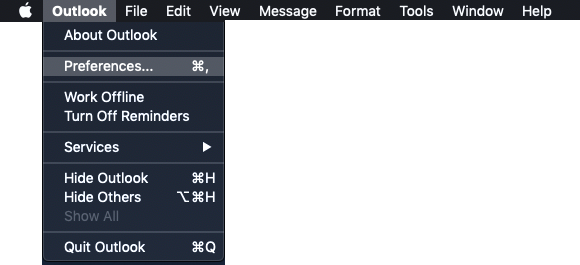
Step 1. Click Outlook in the top left bar, and then click Preferences.
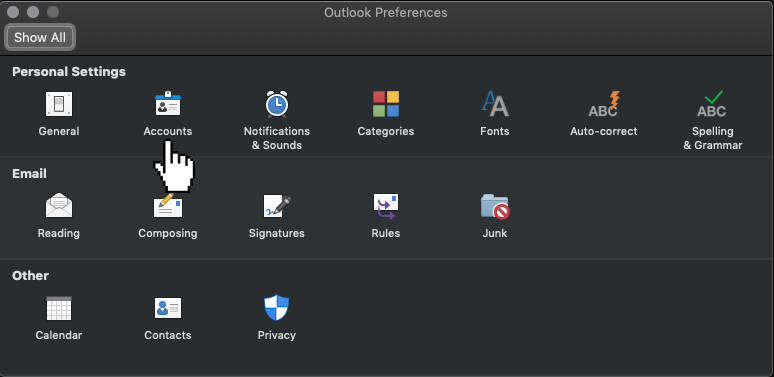
Step 2. Under Personal Settings, click Accounts.
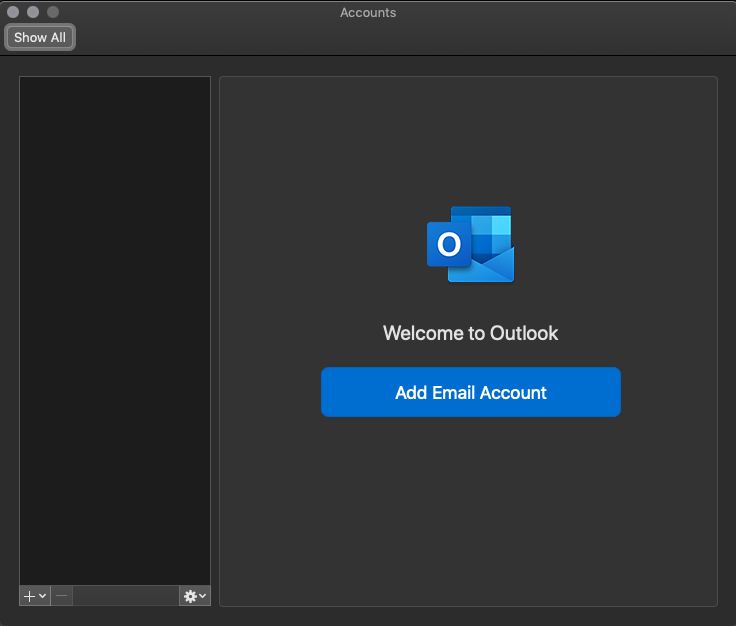
Step 3. Click Add Email Account.
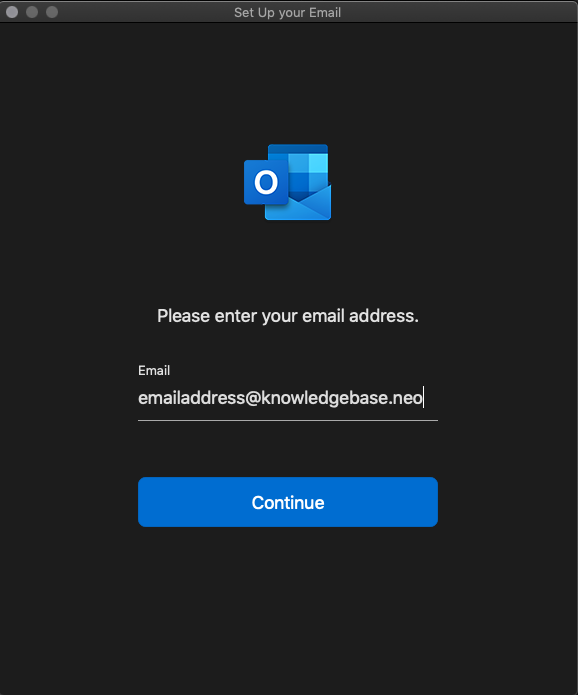
Step 4. Enter the e-mail address that you are looking to add to your Outlook client, and click Continue.
Step 5. Check the email settings. When you use the email server of your Neostrada hosting package, this is mail.domain.extension by default (replace domain.extension with your domain followed by the extension). It is also important to note that port 993 (IMAP) and 465 (SMTP) should use the SSL option in Outlook.
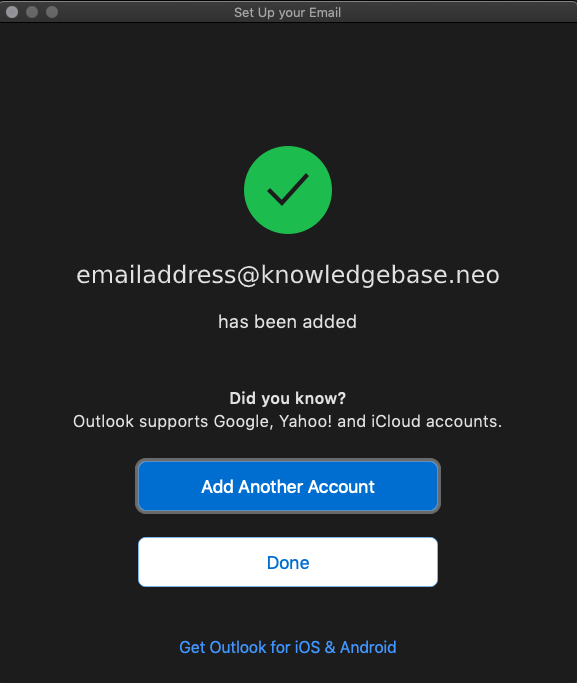
Step 6. When you have clicked Add Account, you will see the following screen. Hurray! Your account has succesfully been added and you will receive your email.