How do I create a staging environment with Softaculous?
It is always a good idea to test a new site or plugin update before you push it to live. Testing WordPress, Joomla and other scripts supported by Softaculous is very easy to do by using Staging.
Preparations
Before you start, it is important that the installation you want to test is installed by Softaculous, if this is not the case, you can often still import the installation.
Also read: How do I import my current installation in Softaculous?
It is also important that you have the subdomain or Addon domain that you want to use for the tests already created in cPanel.
Also read: How do I add a domain name?
Steps for creating a Staging environment
Step 1: Log in to cPanel.
Step 2: Under the Software category, click on Softaculous Apps Installer.
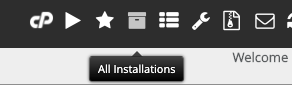
Step 3: Click on Installations, or All Installations at the top right of the screen.
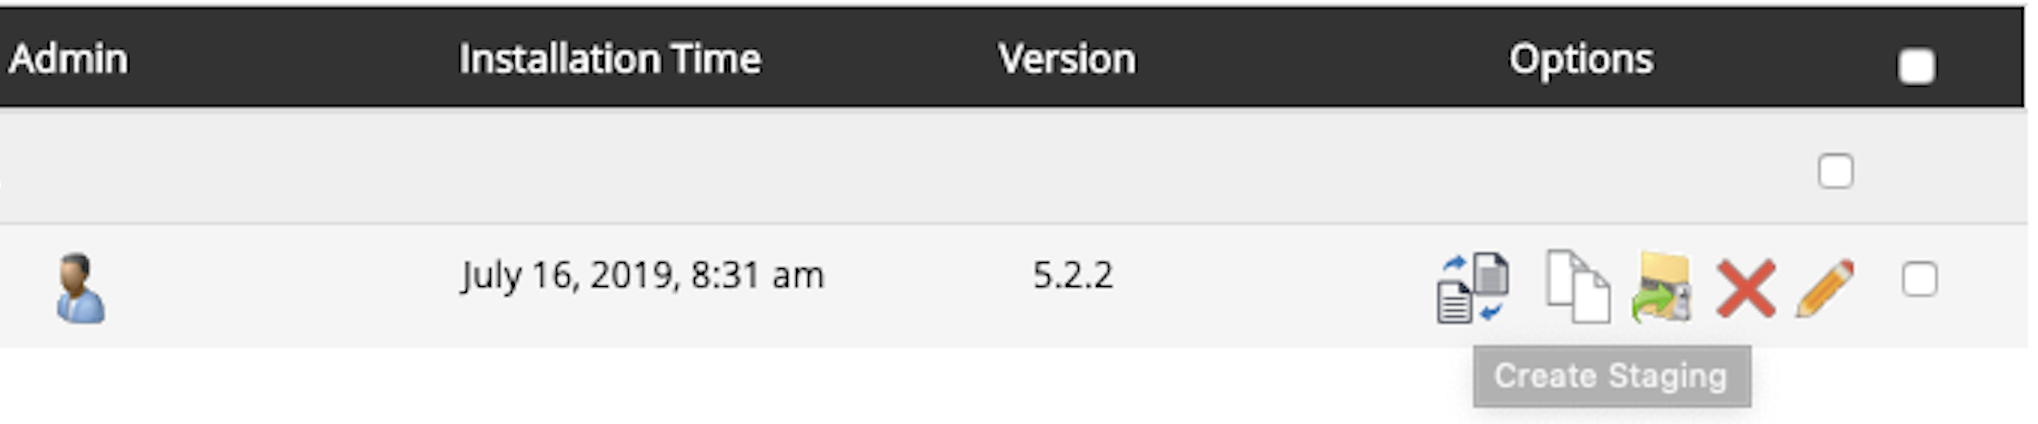
Step 4: Click Create Staging on the installation that you want to test.
Step 5: Select the subdomain or addon domain that you want to use as a test environment, and choose a name for the database that will be created. The domain or subdomain that you select may not already contain data. Furthermore, the database may not be an existing database. If you want to use HTTPS, the certificate must also be active for the staging subdomain.
Also read: How can I get a SSL-certificate though AutoSSL?
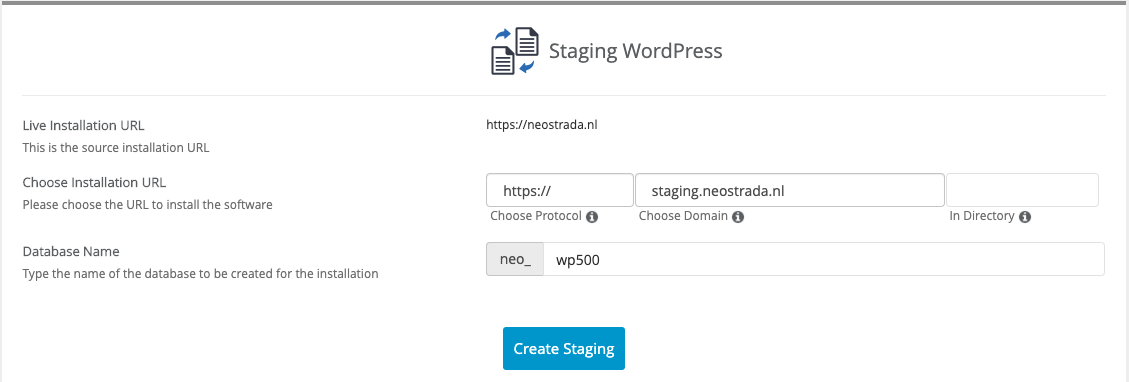
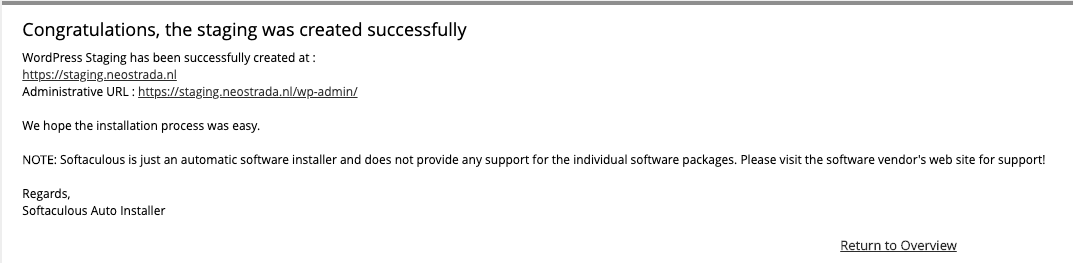
Step 6: Click Create Staging. The staging environment is now being created. When you see the screen below, the staging environment is created and ready for use!
Steps for Pushing to Live
Completely done with testing and making adjustments? Time to push the installation to Live!
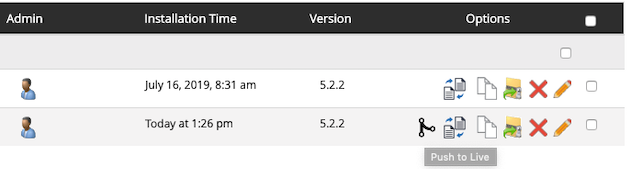
Step 1: Use the first 4 steps from the Staging Step-by-step plan to Installations or All Installations.
Step 2: Click Push to Live on the installation that you want to push to your live website.
Step 3: Select the options for the push to the live environment. Note: if you use the Default Options, the live database will be deleted and overwritten! So select Customize here.

Step 4: Select the desired options. Softaculous will show the changes to the database structure and tables here. Check these options for the desired behavior. If you do not want to delete data in the live database, it is important that the Push Full Database checkmark is disabled.
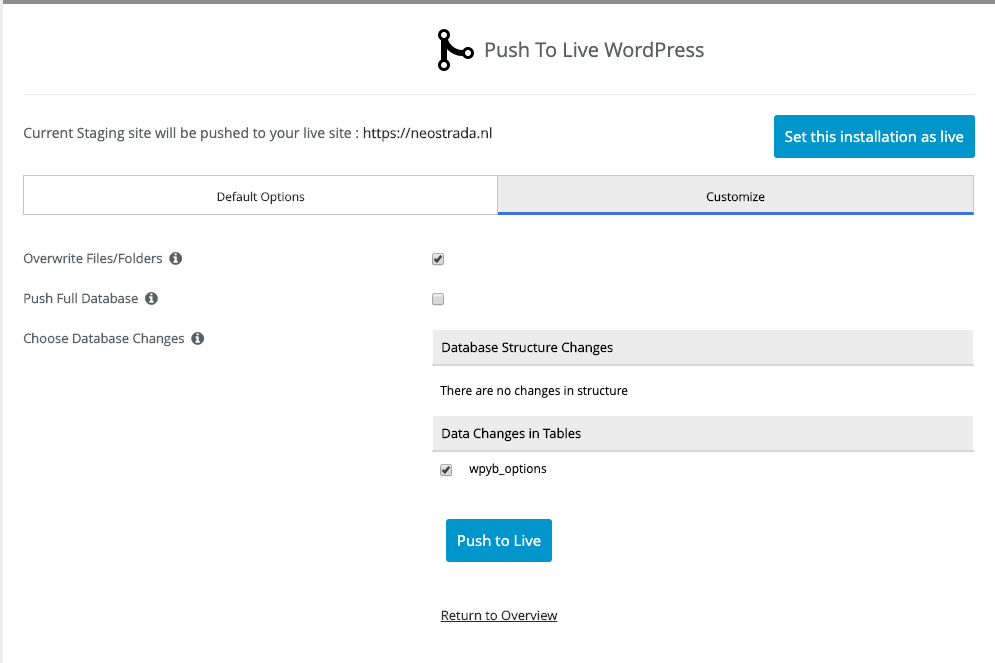
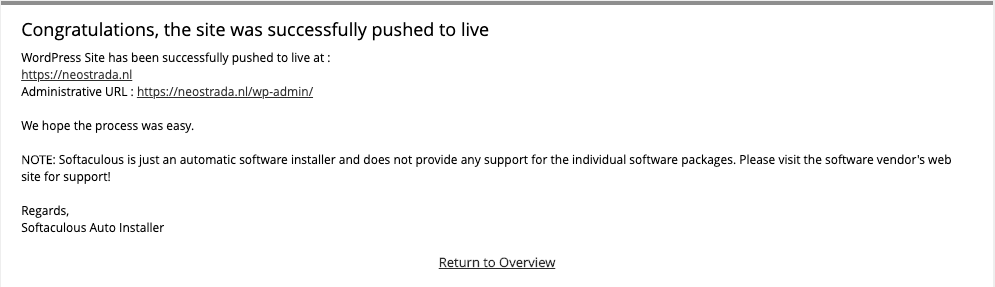
Step 5: Click Push to Live. The staging environment is now pushed to Live, and will be completely completed when you see the screen below!