How do I change my WordPress domain name?
Imagine you have built a beautiful website in WordPress, but suddenly you get an inspiration for an even better domain name! Oh no, you have to completely re-create the installation and posts, but there is a solution! With a simple plugin or a few commands you can change the domain or location of your WordPress installation.
WordPress CLI
If you want to change the WordPress URL you can do this via a couple commands that you enter in the Terminal. Within a few seconds your WordPress domain name will be updated!
Important: Through the terminal or SSH you can make changes to your package without confirmation, or even delete all data on your package. It is therefore important that you know what you are doing when you use WordPress CLI via Terminal or SSH. If you do not want to use SSH or Terminal, you can use the alternative method shown at the bottom of this article using a WordPress Search & Replace plugin.
Also see: How do I use SSH?
WordPress CLI steps
Step 1: Log in to cPanel, and go to Terminal. You can also perform these steps via SSH.
Step 2: Navigate to the path where your WordPress installation is located. You do this by executing the command cd followed by the folder. For example, if the WordPress installation is in public_html run:
cd public_html
If you now receive an error message, the path is not correct. Check the path in cPanel in Domains. If you see [username@server folder] $ it is successful and you have arrived at the location you indicated.
Step 3: Make the adjustment. Do you want to change the WordPress URL? Then enter the following command:
wp search-replace 'oldurl.extension' 'newurl.extension'
Here you replace oldurl.extension with your old domain name with the extension, and newurl.extension with your new domain name with the extension.
Copy and paste this command exactly, as an extra or one less slash can break your website!
Step 4: Check if the website is visible on the new URL. Is the site visible? Hooray! Is this not the case? Please contact [email protected] and indicate at which step in this manual you got stuck!
Search & Replace Plugin

With the Search & Replace plugin you can change the WordPress URL. Moving the WordPress installation to another folder when you use domain.extension/wp, for example, is also possible with this plugin.
Important: In this article we use the Search & Replace plugin. Although we can recommend this plugin, we do not provide any support or warranty. For more information about the precise operation, see the documentation of the Search & Replace plugin.
Search & Replace steps
Step 1: Install the plugin.
Also see: How do I install a WordPress plugin?
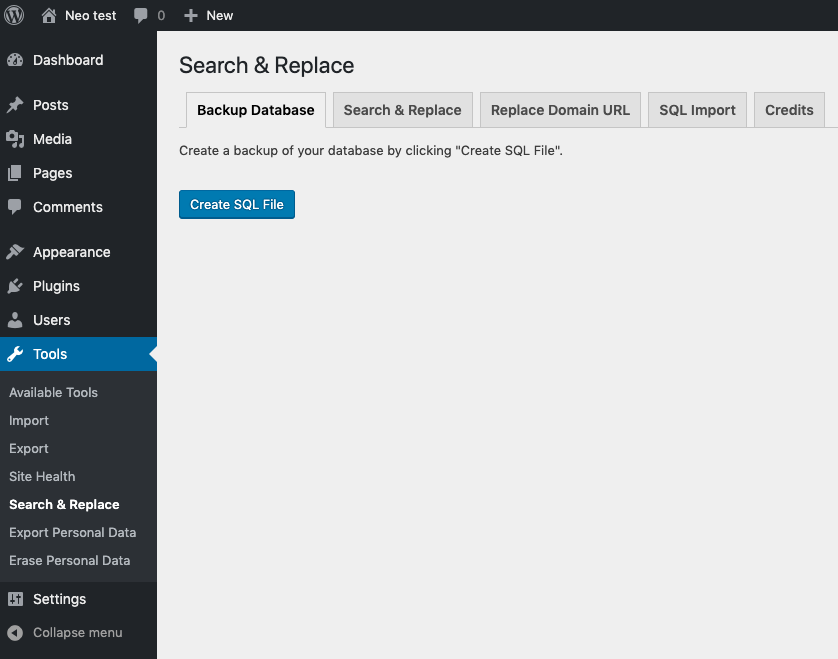
Step 2: Within WordPress go to Tools, and then Search & Replace.
Step 3: Make a backup of your database with the button Create SQL File, this is under the heading Backup Database. Save this file locally in a safe location.
Step 4: Enter the desired adjustment in the Search & Replace header. Enter the old and new URL here, and select all tables with the Select all tables button.
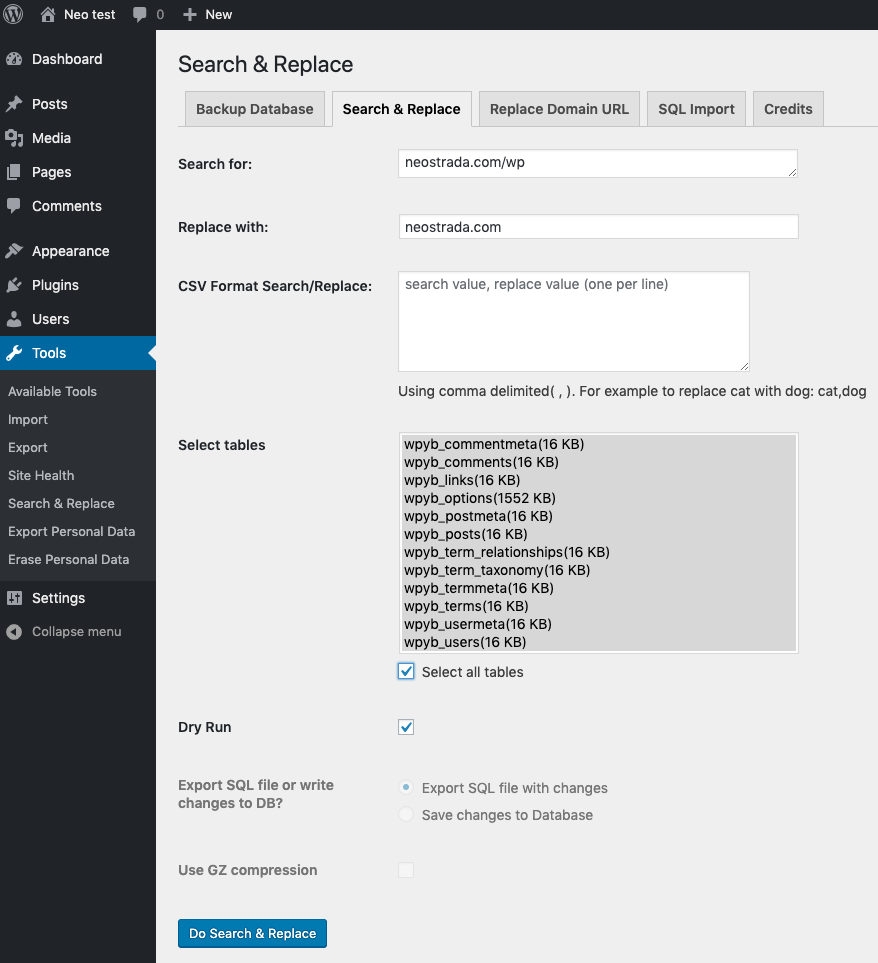
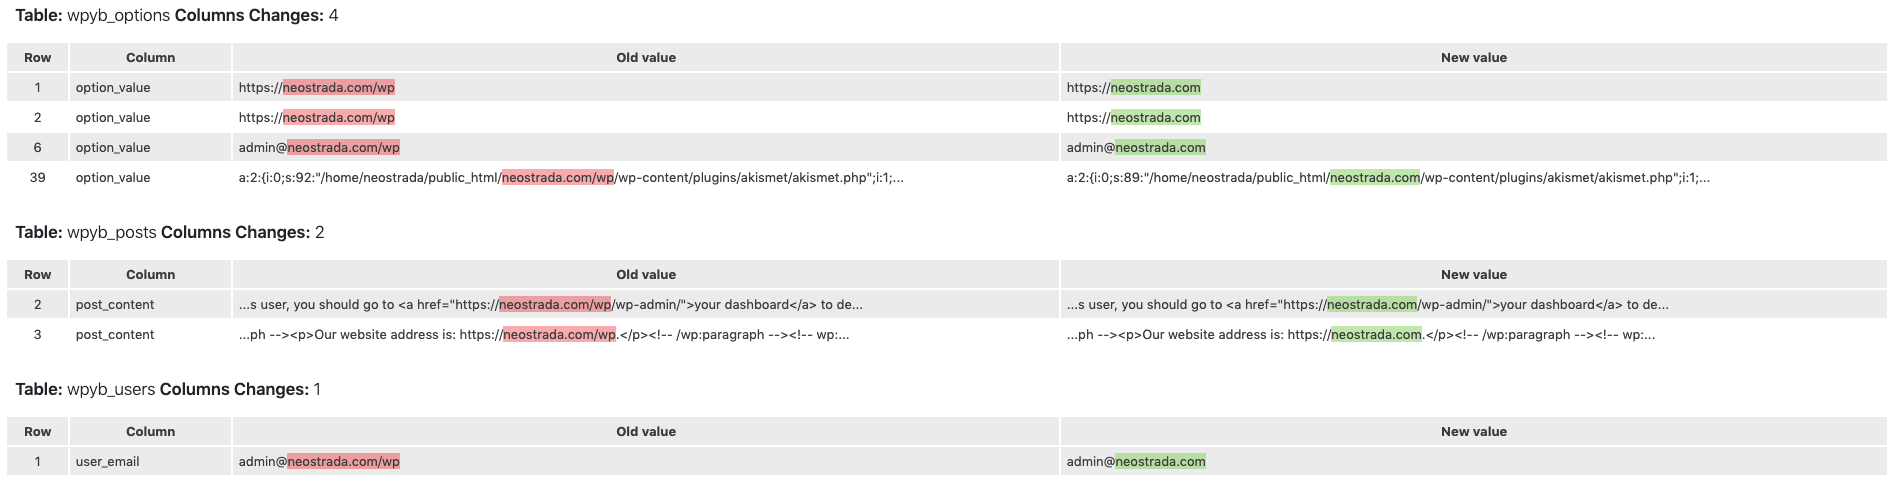
Step 5: Perform a Dry Run, this shows when you click on Details which adjustments will be made. Check these changes and make changes if necessary. It is important to check for any unwanted changes beforehand, as it's much harder to make changes after the fact.
Step 6a (Optional): You can choose to export this separately as an SQL file instead of directly activating it by selecting Export SQL file with changes.
Step 6b: If all changes are correct, remove the check mark from Dry Run, check Save changes to Database and make the actual change.
Step 7: Check if the website works. If you see a page with an index or / as in the screenshot, then steps 8 to 11 apply. Do you see a working website? Hooray, it worked!

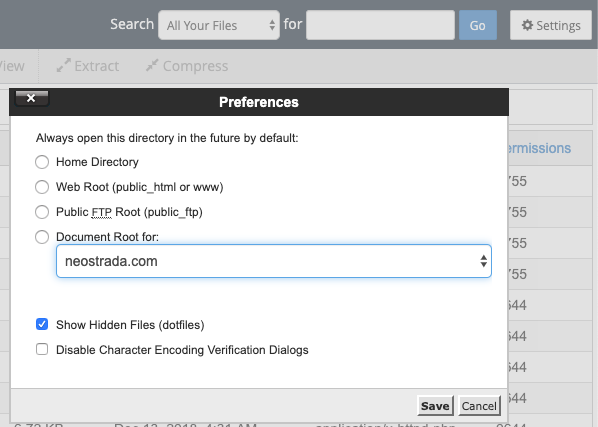
Step 8 (Only applicibla with Index of / page): Log in to cPanel, and go to File manager. You can also perform this step via FTP.
Step 9 (Only applicibla with Index of / page): Go to the folder where your WordPress installation is located. For the main domain of your package this is public_html. If you do not know which folder the website is in, you can see this via Domains in cPanel. Important: Enable the visibility of .dotfiles (system files) by selecting Settings at the top right and placing the checkmark next to this option.
Step 10 (Only applicibla with Index of / page): Move the contents of the folder to the location where the site should be located. For example, if you have public_html / wp as the original location, move the contents of the folder to public_html.
Step 11 (Only applicibla with Index of / page): Check whether the website is now working properly. Is everything working properly? Hoera! Do you still have problems? Contact [email protected], and indicate at which step of this article you got stuck.


