Do you support CDN?
CDN, or Content Delivery Network helps your website load faster for visitors around the world. We work together with Cloudflare to offer you a lightning-fast CDN. You can activate Cloudflare for all your websites for free.
Activate CloudFlare on Shared servers
Important: Unfortunately, this functionality is currently no longer possible due to changes to CloudFlare's API. This can still be set manually, see the steps for activation on Cloud servers.
Step 1: Log in to cPanel.
Step 2: Under Domains, click CloudFlare.
Step 3: Log in if you already have a CloudFlare account. Don't have a CloudFlare account? Then you can directly register for free on the CloudFlare website.
Step 4: Select a domain name for which you want to activate CloudFlare and click Provision. Your DNS records are automatically updated in the background. A backup is made of the DNS records that cause a conflict.
Step 5: After you have activated a domain name, click on Domains. Here you can see all subdomains for which you can switch CloudFlare on and off.
Note: The domains that use CloudFlare will copy their current DNS records to the CloudFlare account. After this all changes in the DNS must be made through CloudFlare.
Deactivate CloudFlare on Shared servers
Go to Settings in the CloudFlare plugin and click on Delete at the bottom of the page. Any backups of DNS records are automatically restored so that your website is not offline for a moment.
Note: If you have CloudFlare enabled, you can only reach cPanel via cpanel.domain where domain is your domain name with extension. If you use domain/cpanel this will not work properly after setting up CloudFlare.
Activate CloudFlare on Cloud servers
The plugin described under Shared servers is unfortunately not available on Cloud servers. You will have to manually activate the CDN on Cloud servers via CloudFlare.
Step 1: Register or log in to CloudFlare.
Step 2: Add the domain on which you want to use CDN via CloudFlare, and choose the package that you want to use. For more information about the plans CloudFlare offers, we refer to the CloudFlare website on plans.
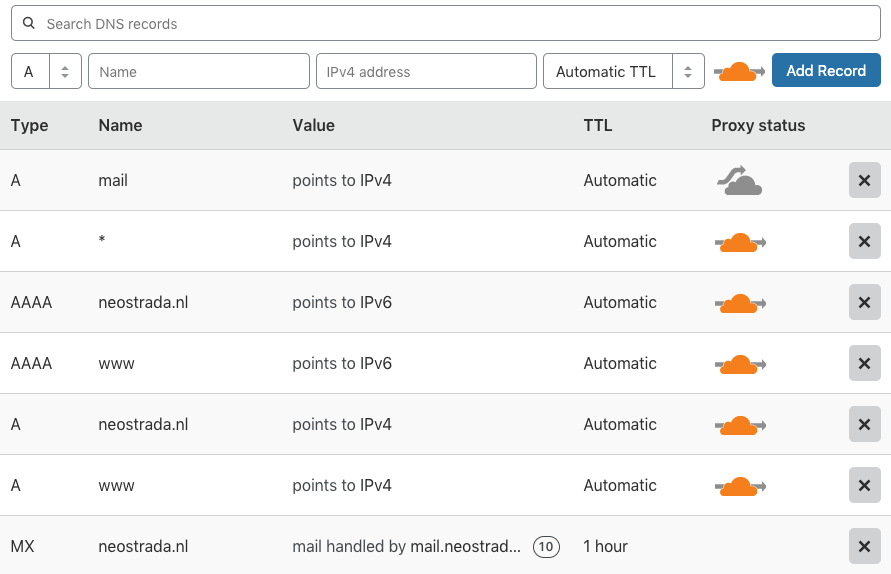
Step 3: Check the DNS records for accuracy. Sometimes the mail.domain record is missing here. If the mail record is not added in the DNS, create it and disable the Proxy status for the mail subdomain. This proxy status sometimes causes mail problems, so this step is important. Follow the steps on CloudFlare until you arrive at the Nameserver settings.
Step 4: Log in to the Neostrada customer panel.
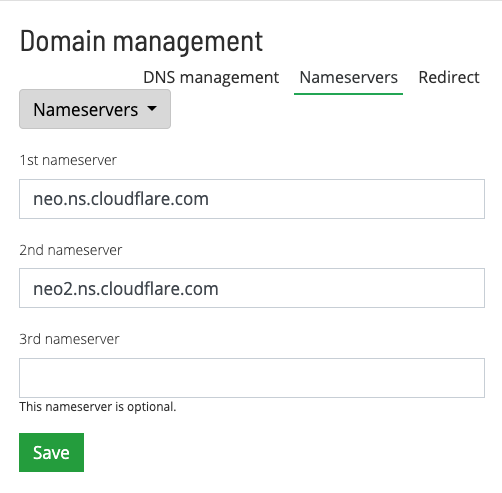
Step 5: Go to Services, and click Change DNS in the cog dropdown menu. Click on the Nameservers header on this page.
Step 6: Enter the CloudFlare Nameservers that you see in the CloudFlare panel in your domain's DNS and click Save.
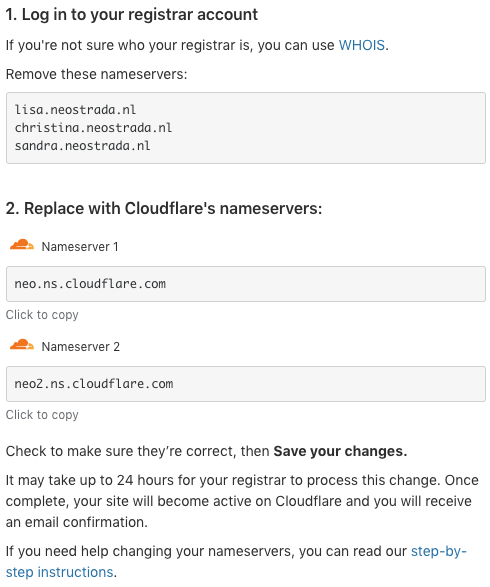
The DNS has now been successfully updated to the DNS of CloudFlare, hurray!
Note: The domains that use CloudFlare will copy their current DNS records to the CloudFlare account. After this all changes in the DNS must be made through CloudFlare.
A DNS adjustment can take 60-90 minutes, are you experiencing problems after about 90 minutes? Please contact [email protected]


